Drywall is common in modern homes, and many slat wall projects are planned for exactly that kind of surface. It can work well, but the fixing strategy should be different from masonry, concrete, or solid timber. Drywall is usually a lining, not the part that should carry every load.
A light decorative slat surface can often be installed with adhesive, screws, or a combination. A larger wall, TV wall, shelving area, or high-touch surface deserves more planning. Studs, a backing board, or battens often give a calmer and safer result than relying on random points in the drywall.
Find what is behind the drywall
Before choosing fixings, find out what sits behind the plasterboard. Many walls have timber or metal studs. Spacing can vary, especially in older or altered homes.
Use a stud finder, look for existing screw lines, tap gently, and check around outlets and trim. The goal is to know both where you can fix and where you should avoid drilling.
Check especially:
- where studs or firm fixing points sit
- whether pipes or electrical runs may be hidden in the wall
- whether the drywall is single or double layer
- whether the wall is flat enough for direct fixing
- whether the slat wall needs to carry more than its own weight
If the wall will support a TV, shelves, or heavy lighting, that load should go into studs, a backing board, or another suitable structure. The slats can be the visible layer, but they should not become the only structure.
Direct fixing can work for light surfaces
For a small decorative wall without extra load, direct fixing can be enough. Many acoustic slat panels are installed with screws through the felt backing, suitable plugs, or adhesive on a clean and stable wall.
Direct fixing works best when:
- the wall is flat and dry
- the slat surface is light
- you will not hang heavy items from the slats
- you accept that adhesive may damage the surface during removal
- the product instructions support the method
Adhesive gives a clean look with no visible screw heads, but it is less reversible. Screws make adjustment and removal easier, and they can be combined with studs or plugs. On drywall, adhesive is often best treated as help for the surface, not the answer to every load.
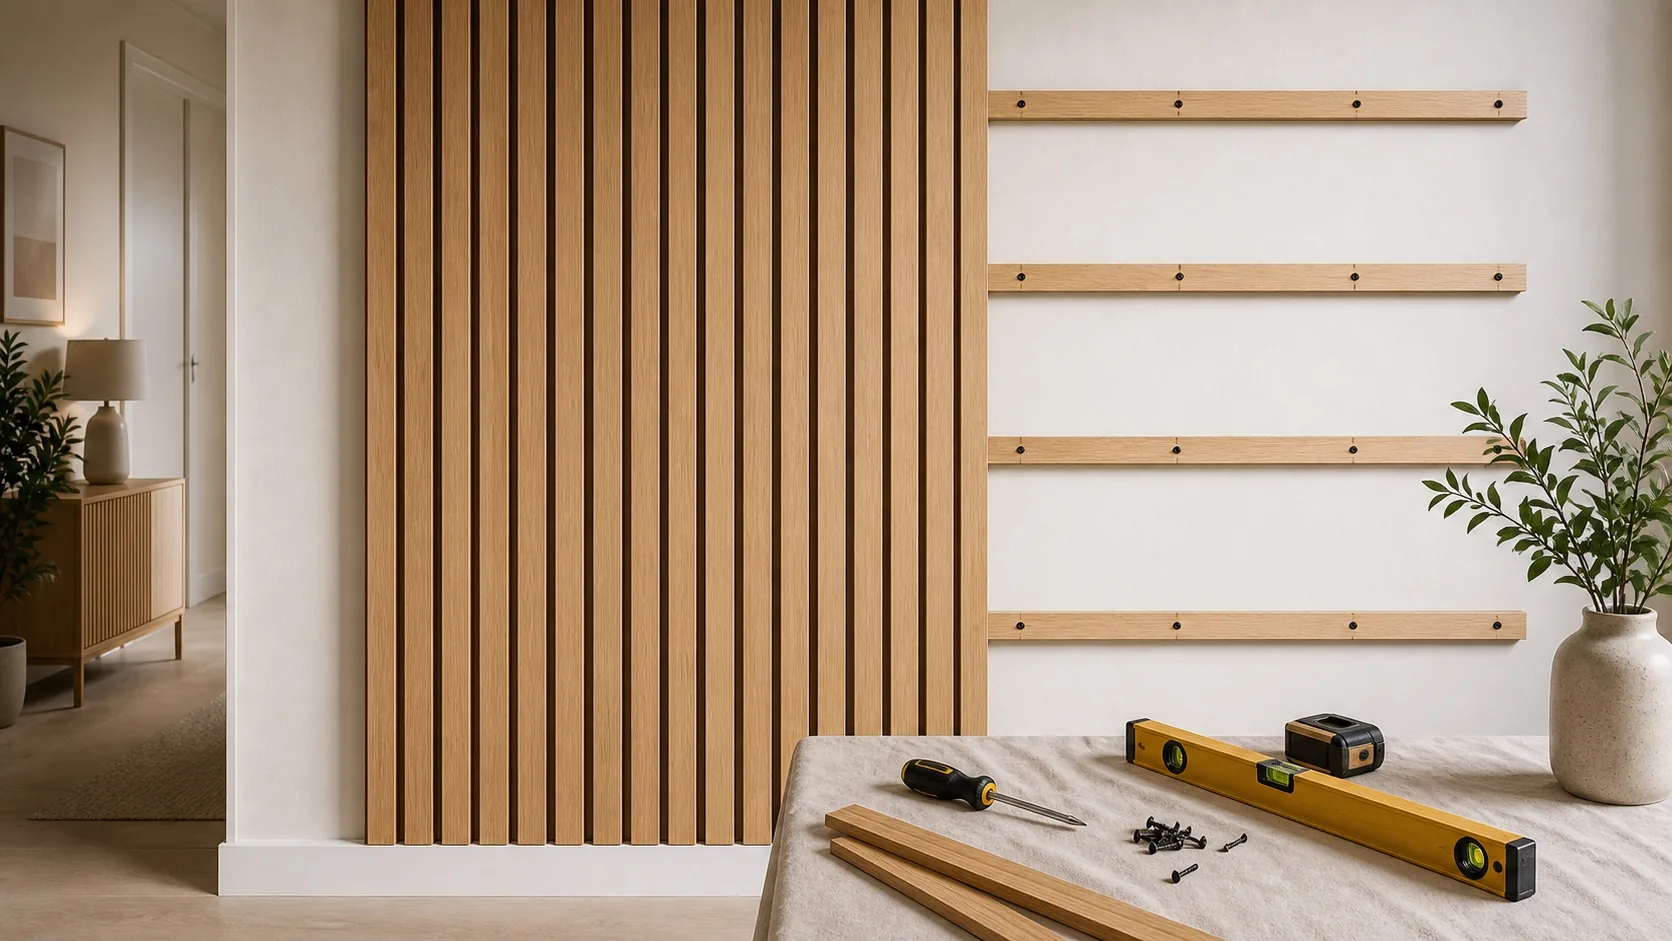
When battens make sense
Battens give better control when the wall is uneven, when you want a stronger acoustic build-up, or when you want regular fixing points. They bring the wall slightly forward, but they also make installation more predictable.
Battens are especially useful when:
- the slat wall covers a large area
- you are installing acoustic panels with felt backing
- you want air or acoustic material behind the panels
- the wall is not completely flat
- you need repeated screw points at consistent spacing
Fix battens into studs wherever possible. Where that is not possible, use fixings made for drywall and the expected load. Check the battens with a level before the slats go on. Small errors in the battens become visible once the rhythm repeats across the wall.
Think about load before finish
A slat wall on drywall can look solid even when the fixing is weak. Separate the loads into three types.
The first is the weight of the slats, felt, backing board, and battens. The second is everyday use, such as touch, cleaning, or furniture close to the wall. The third is point load, such as a TV mount, shelf, lamp, or framed artwork.
For point loads, do not rely on a single slat or a random drywall plug. Plan a hidden fixing zone behind the slats, or send the load into studs. If the design involves electrical work, a wall-mounted TV, or heavy elements, resolve those details before the surface is closed. This matters in particular for an entryway slat wall with hooks and a bench, where everyday point loads add up.
Make the wall look straighter
Good fixing is not only about strength. It also affects how straight and calm the wall looks. Drywall can have small waves, and slats reveal those deviations because the rhythm repeats.
Measure the full wall first, and use the slat wall calculator to test slat width and gap before choosing a starting point. The guide on installing a slat wall covers alignment, spacing, and sequence in more detail.
A reliable setup is:
- mark studs and risk areas before cutting material
- decide between direct fixing, battens, or backing board
- set the first slat or panel with a level
- keep spacing consistent with spacer blocks
- pre-drill where the timber may split
- plan the finish around trim, corners, and outlets
Plan outlets and technical details early
Outlets, switches, and wall boxes should be considered before the slat wall is built out. A slat wall changes the wall depth, which can affect how covers and frames meet the new surface.
Do not hide junction points or make electrical parts inaccessible. If anything needs moving or extending, bring in the right trade before the slats are installed. It is much easier while the wall is still open.
The safest solution is often the quietest
A good slat wall on drywall looks simple when finished. That usually means the fixing points, battens, and backing were planned before the visible surface went on. Direct fixing can be fine for light decorative areas, but larger installations are usually straighter and more reliable with a better base.
Start with the wall behind the slats, not with the first slat. Once you know where the studs are, how the load will be carried, and which installation method fits the project, the rest becomes much easier to control.
Frequently asked questions
Can I install a slat wall straight onto drywall without hitting studs?
A light, decorative slat surface without extra load can often be glued or screwed directly with suitable drywall plugs. If the wall will carry a TV, shelves, or hooks, the load should go into studs, a backing board, or battens.
How many slats do I need for a 240 cm drywall wall?
Calculate wall width / (slat width + spacing). With 48 mm slats and an 18 mm gap, that is 2400 / 66 ≈ 36.4, so round up to 37 slats. With a 10% allowance that corresponds to around 97.7 linear metres.
When should I use battens instead of direct fixing?
Use battens when the wall is uneven, covers a large area, needs air or acoustic material behind the panels, or when you need fixed screw points at consistent spacing. Battens give a calmer install and a straighter result.